
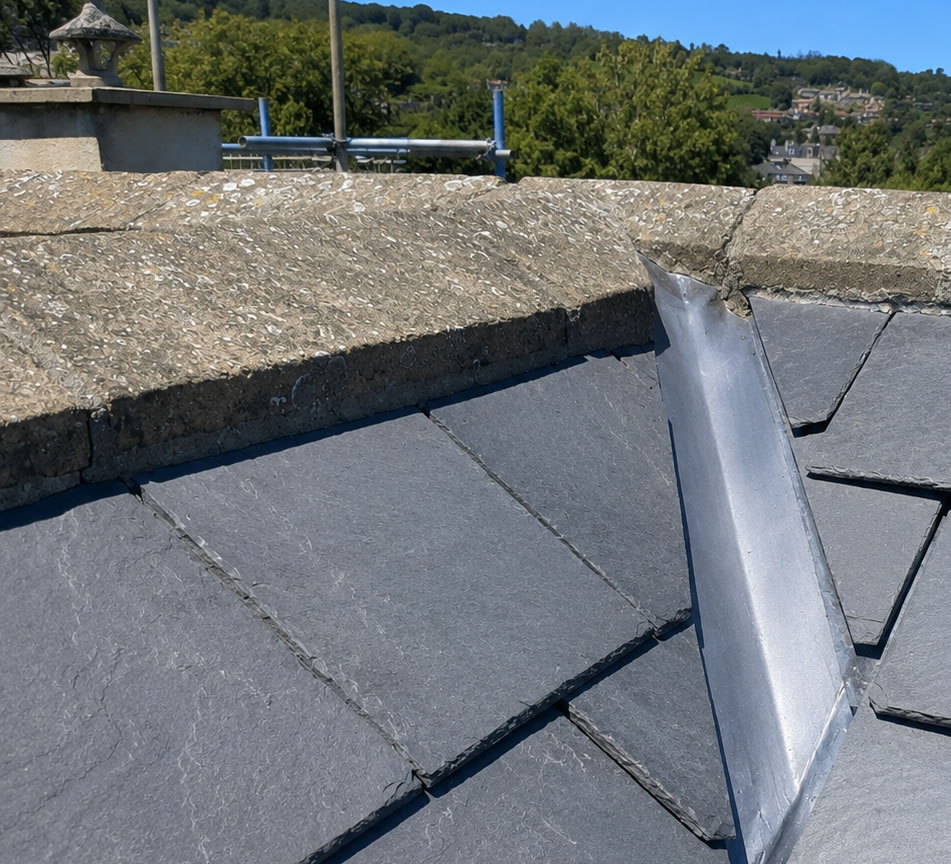
Roof valleys are one of the most important drainage points on a pitched roof. They sit where two roof slopes meet and carry rainwater down towards the guttering.
Because valleys handle a large amount of water, even a small defect can lead to leaks inside the property. Cracked mortar, slipped tiles, blocked channels and damaged leadwork are all common causes of roof valley problems in the UK.
Unfortunately, valley faults are not always easy to spot from ground level. Water may enter at one point, travel along roofing felt or timbers, and then appear on a ceiling several metres away.
This guide explains the most common roof valley faults, how repairs are carried out and when a full valley replacement may be necessary.
What Is a Roof Valley?
A roof valley is the internal angle formed where two sloping roof sections meet.
Its main job is to collect rainwater from both roof slopes and direct it safely into the gutter. Valleys are commonly found on:
- L-shaped houses
- Dormer roofs
- Extensions
- Porches
- Cross-gable roofs
- Complex pitched roofs
- Properties with several roof sections
Depending on the age and design of the building, a valley may use lead, GRP, concrete tiles, proprietary valley troughs or traditional mortar bedding.
Why Do Roof Valleys Fail?
Roof valleys sit in one of the wettest parts of the roof. They carry more water than the surrounding tiles and often collect leaves, moss and debris.
Over time, weathering and movement can weaken the materials around the valley.
Common reasons for failure include:
- Age-related deterioration
- Cracked mortar
- Split or corroded lead
- Slipped roof tiles
- Poor original installation
- Blocked drainage channels
- Moss and leaf build-up
- Movement in roof timbers
- Storm damage
- Frost damage
- Incorrect valley width
- Water flowing beneath tiles
- Failed roofing felt beneath the valley
Some valley problems develop slowly, while others appear suddenly after heavy rain or strong winds.
Common Roof Valley Faults at a Glance
| Roof Valley Fault | Typical Cause | Possible Result |
|---|---|---|
| Cracked valley mortar | Age, frost or movement | Water enters beneath tiles |
| Split lead lining | Fatigue, poor detailing or thermal movement | Persistent roof leak |
| Blocked valley channel | Moss, leaves and debris | Water backs up under tiles |
| Slipped valley tiles | Failed fixings or wind damage | Exposed underlay and water entry |
| Corroded metal lining | Age or unsuitable materials | Holes and localised leaks |
| Poorly cut tiles | Bad workmanship | Water escapes from the channel |
| Damaged valley trough | Impact, age or movement | Cracks and water penetration |
| Failed underlay | Age or prolonged moisture | Water reaches roof timbers |
| Narrow valley | Poor design or later alterations | Overflow during heavy rain |
| Loose mortar bedding | Weathering and movement | Tiles become unstable |
Signs That a Roof Valley Needs Repair
A leaking roof valley can cause visible and hidden damage.
Common warning signs include:
- Damp patches on ceilings
- Water stains near roof junctions
- Dripping during heavy rain
- Moss growing heavily along the valley
- Cracked or missing mortar
- Loose or slipped tiles
- Sagging valley lining
- Rust or splits in metalwork
- Debris blocking the channel
- Water overflowing during rainfall
- Rotting roof timbers
- Damp insulation in the loft
- Peeling paint or damaged plaster
Leaks that only appear during wind-driven rain often point to a problem with tile overlap, flashing or valley detailing.
Why Roof Valley Leaks Can Be Difficult to Find
Water does not always fall directly beneath the damaged area.
Once it enters beneath the roof covering, it may travel along:
- Roofing felt
- Battens
- Rafters
- Insulation
- Valley boards
- Ceiling joists
As a result, the damp patch inside the property may not sit directly below the valley defect.
A proper inspection usually involves checking both the outside roof covering and the loft space.
1. Cracked Valley Mortar
Traditional valleys often use mortar to secure the cut tiles along each side.
Over time, the mortar can crack, crumble or separate from the tiles. Frost, roof movement and repeated wetting all contribute to the problem.
Once gaps form, water can pass beneath the tiles and onto the underlay.
Typical signs
- Loose mortar pieces in the gutter
- Visible cracks along the valley edge
- Tiles moving when lightly checked
- Damp patches after heavy rain
- Moss growing inside mortar joints
Repair options
Small localised defects may be repointed. However, patching over badly deteriorated mortar rarely lasts.
Where large sections have failed, the contractor may need to remove the valley tiles, clean out the old mortar and rebuild the edges properly.
2. Split or Cracked Lead Valleys
Lead remains a common material for roof valleys because it is flexible and durable.
However, lead can split if it has been installed in sections that are too long or fixed too tightly. Thermal expansion causes the metal to move as temperatures change.
If the lead cannot move freely, fatigue cracks may develop.
Other causes of lead failure
- Incorrect lap lengths
- Poor support beneath the lead
- Nails driven through the lining
- Mortar touching the wrong areas
- Foot traffic
- Corrosion from incompatible materials
- Previous patch repairs
- Movement in the valley boards
Small cracks may sometimes be repaired using a suitable lead patch. Larger or repeated splits often require replacement sections.
3. Blocked Roof Valleys
Leaves, moss, twigs and broken mortar can build up in the valley channel.
Once the water path becomes restricted, rainwater may back up beneath the surrounding tiles. During heavy rainfall, it may overflow sideways.
Blocked valleys are particularly common on properties surrounded by trees.
Problems caused by blockages
- Water entering beneath tiles
- Moss holding moisture against the roof
- Faster corrosion of metal linings
- Additional weight in the valley
- Blocked gutter outlets
- Overflow onto walls and windows
- Freeze damage during winter
Removing debris early can prevent a minor maintenance problem from becoming a roof repair.
4. Slipped or Broken Valley Tiles
Tiles along a valley are often cut to fit the roof angle.
Because these tiles are smaller than standard tiles, they may have fewer fixing points and can become loose more easily.
Strong winds, failed nails or deteriorated mortar may cause them to slip.
Broken tile edges can also direct water away from the valley channel and beneath adjacent tiles.
The contractor may need to:
- Replace broken tiles
- Recut badly shaped tiles
- Add suitable mechanical fixings
- Rebuild mortar bedding
- Check the valley width
- Inspect the underlay beneath
5. Damaged GRP Valley Troughs
Many modern roofs use GRP valley troughs.
GRP is lightweight and resistant to corrosion. However, it can crack through impact, poor support, incorrect installation or prolonged movement.
Damage may also occur if roof tiles press too heavily against the trough.
Small cracks may sometimes accept a specialist repair. Nevertheless, a badly split or distorted trough usually needs replacement.
6. Corroded Metal Valleys
Older properties may contain zinc, galvanised steel or other sheet-metal valley linings.
Over time, these materials can corrode and develop holes. Standing water, debris and contact with incompatible materials may speed up the process.
Corrosion often starts beneath moss or trapped leaves, where the metal remains damp for long periods.
Once the lining has thinned significantly, patch repairs may only provide a short-term solution.
7. Poorly Cut Valley Tiles
Valley tiles must be cut accurately so water can travel freely down the channel.
If tiles project too far into the valley, they may restrict water flow. If they sit too far back, wind-driven rain may pass beneath them.
Rough or uneven tile cuts can also create weak points where tiles crack.
A professional repair by a good roofer may involve removing the affected tiles and cutting replacements to create a consistent valley width.
8. Failed Roof Underlay
The underlay beneath the valley provides an additional layer of protection.
Older roofing felt can become brittle, torn or rotten. If the valley lining leaks, damaged underlay may allow water to reach the roof timbers quickly.
Modern breathable membranes can also fail if they have been cut incorrectly or left unsupported.
Repairing the visible valley without checking the underlay may leave part of the problem unresolved.
9. Damaged Valley Boards
The valley lining normally sits on timber boards or another suitable support.
If these boards rot, sag or move, the valley can lose its shape. Water may then collect in low areas instead of flowing towards the gutter.
Signs of damaged valley boards include:
- Dips in the valley
- Standing water
- Cracked lead
- Loose tiles
- Movement under light pressure
- Rot visible from the loft
Replacing the boards usually requires removing the valley covering and nearby tiles.
10. Poor Valley Design
Some roof valleys fail because of their original design.
A valley may be too narrow for the amount of water it receives. Roof alterations can also increase the drainage load without changing the valley size.
Problems may occur where:
- Two large roof slopes drain into a narrow channel
- A dormer empties directly into the valley
- Gutters discharge onto the roof above
- Solar panels concentrate water flow
- An extension changes the original drainage pattern
- Tile overhang reduces the usable channel width
In these cases, a simple patch may not solve the underlying problem. The valley may need to be widened or redesigned.
Types of Roof Valley
| Valley Type | Description | Common Problems |
| Lead-lined valley | Traditional lead sheet installed over valley boards | Splits, poor laps, fatigue cracks |
| GRP valley trough | Preformed fibreglass channel | Cracking, distortion, poor support |
| Dry valley system | Mechanically fixed system without mortar bedding | Loose clips, poor tile cuts |
| Mortared valley | Tiles bedded into mortar along the valley edge | Cracked mortar, loose tiles |
| Metal valley | Zinc, steel or other metal lining | Corrosion and punctures |
| Swept valley | Tiles shaped or arranged to flow through the junction | Complex repairs and tile movement |
| Close-cut valley | Tiles closely cut to meet at the centre | Debris traps and water entry if poorly installed |
Roof Valley Repair Methods
The right repair depends on the material and the extent of the damage.
Localised Repointing
Loose or cracked mortar is removed and replaced.
This method suits small areas where the surrounding mortar and tiles remain sound.
Tile Replacement
Broken or slipped valley tiles are replaced and fixed securely.
Replacement tiles should match the existing roof as closely as possible.
Lead Patching
Small lead splits may be covered with a properly formed patch.
The repair must allow the lead to expand and contract naturally.
Lead Valley Replacement
Badly split or incorrectly installed lead may need complete replacement.
The contractor removes nearby tiles, lifts the old lining and installs new lead in correctly sized sections.
GRP Trough Replacement
A cracked valley trough may need removing and replacing.
The contractor must check the support, laps and tile positioning during the work.
Valley Rebuild
A full rebuild may include:
- Removing tiles on both sides
- Removing mortar
- Replacing valley boards
- Renewing underlay
- Installing a new lining
- Recutting tiles
- Refixing the roof covering
- Repointing where required
Repair or Replace the Roof Valley?
| Condition | Likely Recommendation |
| Small isolated mortar crack | Local repair may be suitable |
| One slipped tile | Refix or replace the tile |
| Small lead split | Patch may be possible |
| Repeated lead cracking | Replace the affected lead sections |
| Widespread mortar failure | Rebuild the valley edges |
| Rotten valley boards | Full strip and rebuild |
| Corroded metal lining | Replace the lining |
| Multiple leaks | Full valley replacement may offer better value |
| Poor original design | Redesign or widen the valley |
| Failed underlay | Remove tiles and renew the waterproof layers |
Repeated patching can become more expensive than replacing a badly worn valley properly.
How Much Do Roof Valley Repairs Cost in the UK?
Costs depend on access, roof height, valley length, materials and the amount of surrounding roof work required.
The following figures are general estimates.
| Roof Valley Work | Typical UK Cost |
| Small mortar repair | £200 to £450 |
| Replace several valley tiles | £250 to £600 |
| Minor lead patch | £250 to £500 |
| Repoint one side of a valley | £400 to £800 |
| Replace a short lead valley | £700 to £1,500 |
| Replace a full roof valley | £1,000 to £2,500 |
| Replace valley boards and lining | £1,500 to £3,500 |
| GRP valley trough replacement | £700 to £1,800 |
| Scaffolding | £500 to £1,500 or more |
| Emergency temporary repair | £150 to £500 |
Complex roofs, listed buildings and hard-to-access properties may cost more.
What Affects the Cost?
Several factors can change the price.
Roof Height
A two-storey or three-storey property may require scaffolding or a mobile access platform.
Valley Length
Long valleys require more materials and labour.
Roof Material
Natural slate and handmade clay tiles often require more careful handling.
Extent of Damage
A cracked mortar joint costs less to repair than rotten valley boards and failed underlay.
Access
Conservatories, extensions and narrow side passages can make access more difficult.
Matching Tiles
Older or unusual roof tiles may be expensive or difficult to source.
Structural Repairs
Rotten timbers or sagging boards will increase the scope of the work.
Can You Repair a Roof Valley Yourself?
Small maintenance tasks, such as checking for visible debris from ground level, may be manageable.
However, roof valley repairs usually involve working on one of the steepest and most fragile parts of the roof.
DIY repair risks include:
- Falling from height
- Breaking cut valley tiles
- Damaging leadwork
- Creating poor water laps
- Blocking the drainage channel
- Using unsuitable sealants
- Walking on fragile roof coverings
- Missing hidden timber damage
- Failing to locate the real leak
Applying roofing sealant over a crack may stop water briefly, but it rarely provides a proper long-term repair.
Professional help is usually the better option for main roof valleys.
Why Roof Sealant Is Often a Temporary Fix
Roofing mastics and sealants can be useful for emergency work. However, they should not replace proper leadwork, tile fixing or mortar repair.
Sealants often fail because:
- The surface remains damp or dirty
- The valley continues to move
- UV light makes the product brittle
- Water gets behind the repair
- The underlying material continues to deteriorate
- The sealant blocks natural drainage paths
A temporary patch may reduce water entry until a contractor can complete a permanent repair.
How Roof Valley Repairs Are Carried Out
A typical professional repair follows several stages.
- The contractor inspects the valley and nearby roof slopes.
- Safe access is arranged.
- Debris and moss are removed.
- Tiles beside the valley are carefully lifted.
- The lining, boards and underlay are checked.
- Damaged materials are removed.
- New lining or repair sections are installed.
- Tiles are replaced or recut.
- Mortar or dry-fix components are completed.
- Gutters and drainage outlets are cleared.
- The repair is checked for correct water flow.
The exact process varies depending on the valley type.
How Long Does a Roof Valley Repair Take?
A small repair may take a few hours.
Replacing a complete valley often takes one to three days. More extensive work may take longer where boards, underlay or surrounding tiles need replacement.
Scaffolding installation can add extra time to the overall job.
Weather also affects the schedule. Contractors may postpone leadwork and open-roof repairs during heavy rain or strong winds.
Should the Valley Be Water Tested?
A contractor may use controlled water testing to confirm the source of a leak.
However, water should be introduced gradually and in separate roof sections. Spraying large amounts of water over the entire roof can make the result difficult to interpret.
Some leaks only appear during wind-driven rain, so visual inspection and loft checks remain important.
How to Prevent Roof Valley Problems
Regular maintenance can reduce the chance of major repairs.
Keep the Valley Clear
Remove moss, leaves and twigs before they block the water channel.
Clean the Gutters
A blocked gutter can cause water to back up at the bottom of the valley.
Check After Storms
Strong winds may loosen cut tiles and dislodge mortar.
Control Moss Growth
Heavy moss can trap water and hide defects.
Cut Back Overhanging Branches
Reducing falling leaves helps keep the valley clear.
Inspect Mortar and Leadwork
Small cracks are easier and cheaper to repair than widespread failure.
Check the Loft
Look for damp timbers, stained felt and wet insulation after heavy rain.
Roof Valley Maintenance Table
| Maintenance Task | Suggested Frequency |
| Visual check from ground level | Every 6 months |
| Clear leaves and debris | At least once a year |
| Clean gutters | Once or twice a year |
| Check after severe storms | As required |
| Inspect loft for damp | After heavy rain |
| Professional roof inspection | Every 2 to 5 years |
| Moss treatment | When growth becomes noticeable |
When Is a Roof Valley Repair Urgent?
A repair should receive urgent attention where:
- Water is dripping into the property
- Ceiling plaster is bulging
- Electrical fittings are wet
- Tiles have fallen
- The valley lining has lifted
- Timber appears rotten
- A large section of mortar has collapsed
- Water is entering during every rainfall
- The leak sits above a bedroom or electrical equipment
Place a container beneath active drips where safe to do so. Avoid entering the roof space if electrical wiring or ceilings appear unsafe.
How to Choose a Roof Valley Repair Contractor
Valley work requires both roofing and waterproofing knowledge.
Ask potential contractors:
- What type of valley do I have?
- What has caused the fault?
- Can it be repaired or does it need replacement?
- Will you inspect the valley boards and underlay?
- Does the quote include scaffolding?
- What material will you use?
- How will the lead be divided into sections?
- Are replacement tiles included?
- Will debris be removed?
- Do you hold public liability insurance?
- Is there a workmanship guarantee?
- Can you provide photographs of the repair?
A written quote should explain whether the work is a temporary repair, local repair or full replacement.
Roof Valley Repair Checklist
| Question | Why It Matters |
| Has the leak source been confirmed? | Ceiling stains may not sit below the fault |
| Is the valley blocked? | Debris may cause water to overflow |
| Are the cut tiles secure? | Loose tiles can expose the underlay |
| Is the lead split or poorly lapped? | Lead movement can create recurring leaks |
| Are the valley boards sound? | Rotten boards cannot support the lining |
| Is the underlay damaged? | Hidden water may reach roof timbers |
| Is scaffolding included? | Access can make up a large part of the cost |
| Is the repair guaranteed? | Clarifies responsibility if the leak returns |
Final Thoughts
Roof valleys carry a large amount of rainwater and need to remain clear, secure and properly lined.
Cracked mortar, slipped tiles, blocked channels and split lead are among the most common faults. Small defects may accept a local repair, while widespread damage often requires the valley to be stripped and rebuilt.
Because water can travel beneath the roof covering, locating the source of a valley leak is not always straightforward. A thorough inspection should include the tiles, lining, underlay, valley boards and loft space.
Regular cleaning and early repairs can prevent water damage from spreading into insulation, ceilings and roof timbers.
Frequently Asked Questions
What is the most common cause of a leaking roof valley?
Cracked mortar, split lead, blocked drainage channels and slipped tiles are among the most common causes. The exact fault depends on the valley design and age.
Can a roof valley be repaired without replacing it?
Yes. Small mortar cracks, isolated tile damage and minor lead splits may accept local repairs. Widespread damage or repeated leaks may require full replacement.
How long should a lead roof valley last?
A correctly installed lead valley can last for several decades. Its lifespan depends on the lead code, section length, support, workmanship and exposure.
Why does my roof valley only leak during heavy rain?
Heavy rain increases the amount of water flowing through the valley. A narrow, blocked or poorly detailed valley may cope in light rain but overflow during a storm.
Can moss cause a roof valley leak?
Moss can block the channel, slow water flow and hold moisture against the materials. It can also hide cracks and displaced tiles.
Can roof valley mortar be repointed?
Small damaged areas can sometimes be repointed. Where the mortar has failed along most of the valley, removing and rebuilding it usually provides a better repair.
Is lead better than a GRP valley?
Both materials can work well when installed correctly. Lead is flexible and traditional, while GRP troughs are lightweight and preformed. The roof design and surrounding materials will affect the best choice.
How much does it cost to replace a roof valley?
A full replacement commonly costs from around £1,000 to £2,500, although access, valley length, scaffolding and timber repairs can increase the price.
Can I use roof sealant on a leaking valley?
Sealant may provide a temporary emergency patch. However, it rarely solves damaged lead, failed mortar, loose tiles or rotten boards permanently.
Does a leaking valley mean I need a new roof?
Not usually. Many valley faults can be repaired without replacing the whole roof. However, extensive tile, underlay or timber damage may require broader work.